How to Replace Carpet in Rv With Slides
Tips to Replace the Flooring Inside an RV Slide Out
Disclaimer: This post may contain affiliate links, meaning, if you click through and make a purchase we may earn a commission. This is at no additional cost to you. View our full-disclosure here.

Are you planning to replace the carpet in your RV but not sure how to handle the slide out? This was certainly a concern we had once we made the decision to install new flooring in our RV.
We did some research and although there is some information out there, there isn't much and every RV is different. So we did what anyone would do, and attacked it head-on, haha. In doing so we've learned some things along the way so we wanted to share some tips to replace the flooring inside an RV slide out with you.
Tips to Replace the Flooring Inside an RV Slide-Out
Installing the flooring in the slide was as easy as installing it everywhere else in the RV.
You may have seen our previous video on how we installed the floating floors on our slide-out or read about it in this post about how to replace the flooring in your RV. In that video and post, we had suggested that you put an underlayment down in the slide-out before installing the flooring in order to ensure it's level. This is especially true if your slide has rollers that make it uneven. We suggested that because we had skipped that step, bad idea.
After a couple of days of walking on the slide-out without the underlayment, we came to the conclusion that the trim piece wasn't stable enough.
About 95% of the slide-out was perfectly stable, but the other 5% (the front edge) didn't sit right with us, so we made a change due to the floor not being completely level. I originally thought the rollers were too small to make a difference. I was wrong.
Check out our updated video that explains how we went about fixing our mistake:
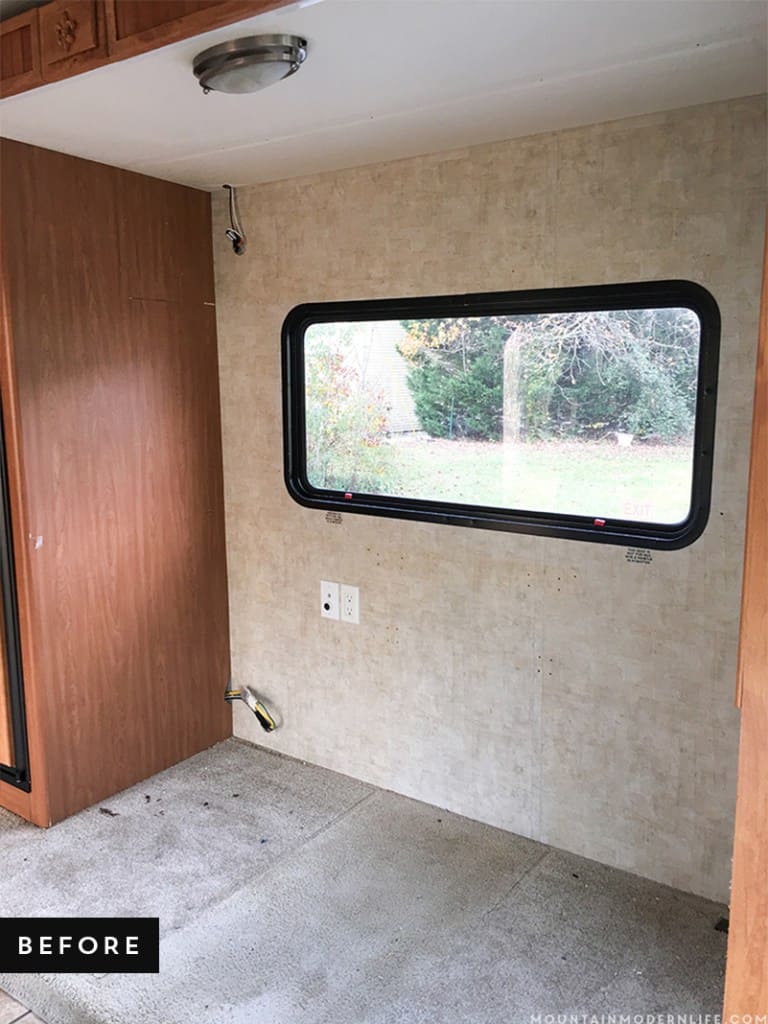
Step 1: Remove the old flooring
You can see how we removed the flooring inside our RV over on this post. This time around we needed to remove all the plank flooring we had placed down on the slide-out.

As I was removing the floating floors I kept each row separate and in order, that way once we had the underlayment in place I could go down the line and replace the flooring that had already been cut to size. It didn't take too long since we have a floating floor so the pieces snap together and aren't glued down.
Step 2: Picking the Underlayment
The main concern without the underlayment was the 4 wheel wells that caused the last row of flooring to be un-level.
I knew that the screws from the wheel wells came up about an 8th of an inch which meant I needed a piece of underlayment that was at least that size. We decided to go with the 1/4 inch OSB (oriented strand board), but you may want to go with a thicker/thinner option or some sort of plywood depending on your situation.
I knew that the 1/4 inch OSB would have enough of a lift to keep the cork backing from our new plank flooring from hitting the wheel of the slide-out, without being quite as heavy as the thicker options.
Step 3: Cutting the Underlayment
We have a Jeep Cherokee, and although I'm amazed at what we can fit inside it, there are limits to the size of the items we can purchase. Because of that, I wasn't able to get the entire piece cut to size when we bought it, instead, I had to cut it into two separate pieces.
Side Note: It is still important to measure the sizes you will need before you go to the store, that way you will at the very least have a plan as to how you will cut it to fit.

At this point, I measure and marked where all the wheel wells were.
When cutting the squares for the wheel wells I first used my drill, creating holes for the jigsaw to get in and work its magic.

Then it was just a matter of cutting along the lines.
Step 4: Painting the Underside of the Slide-Out
The first time we did this (without the underlayment) we realized you were able to see a little bit of white underneath the trim piece we had installed. It wasn't a lot of white, but one or two spots that stuck out like a sore thumb.
The best way we thought to address this was to use a little black chalk paint.

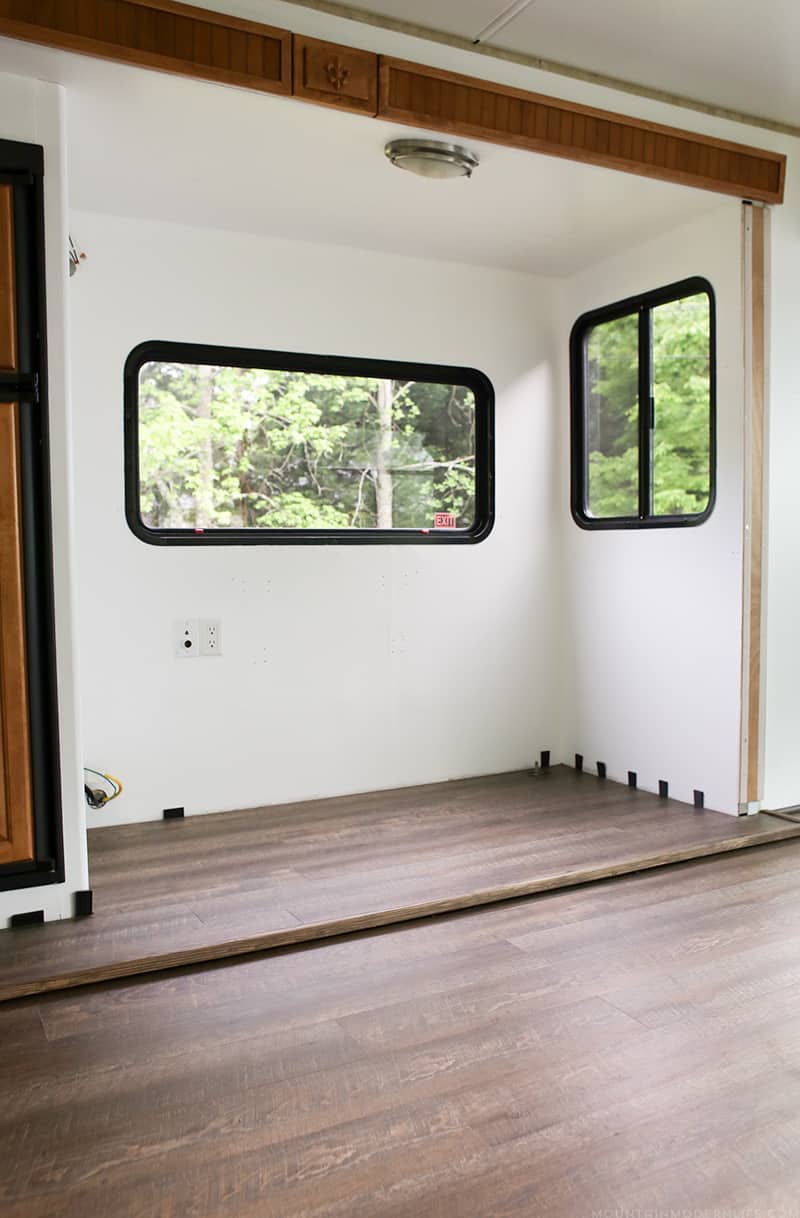
Step 5: Placing the Underlayment-Down
I took an approach that was one at a time. Meaning I got my bigger piece cut and in place first.
I then cut and placed the smaller piece that would go in front of the fridge.

Step 6: Install Flooring in the Slide-Out
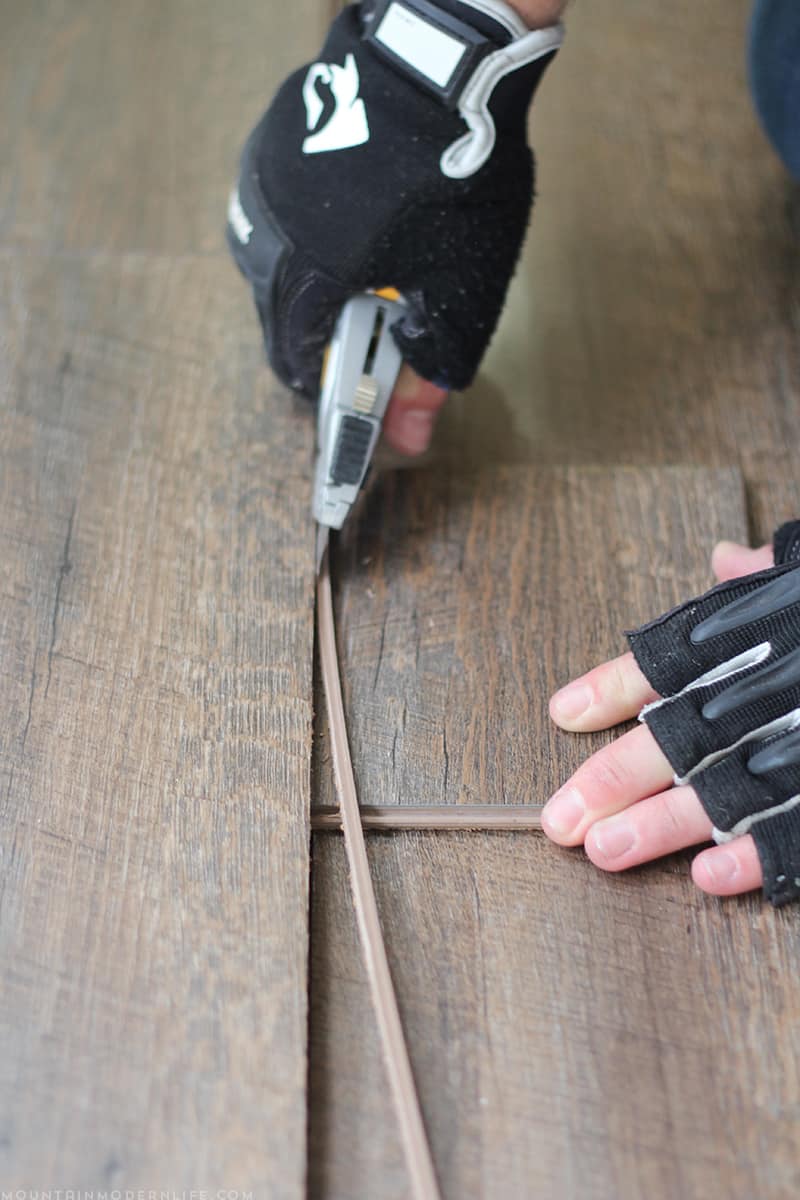
This last step was fairly easy because all of the flooring was already cut to size. I went ahead and used the spacers along the edges to leave room for expansion and contraction then laid it all down.

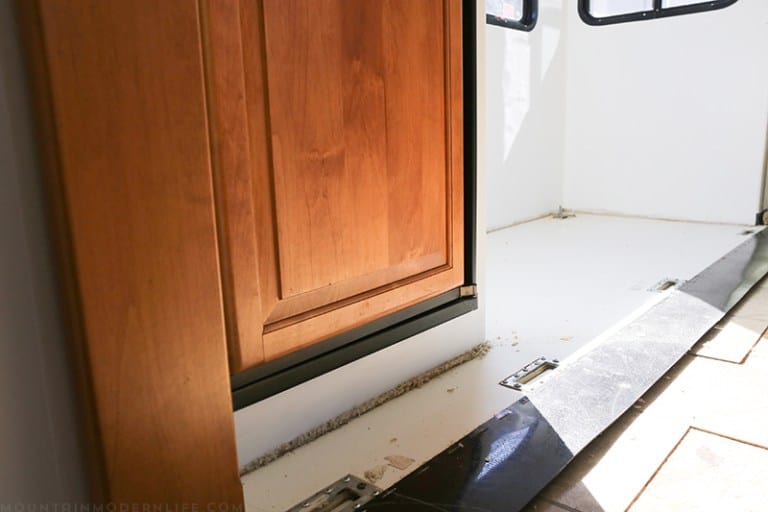
When I originally installed the flooring in the slide I had removed the plastic flap from the edge. as well as the lip from the last section of flooring as you can see in the photos below:

Step 7: Adding Trim to the Slide-Out
If you're looking for ways to finish the edge of your RV slide-out, you may want to consider using Flush Mount Stair Nose Moulding (also known as bullnose stair moulding), or an overlap reducer.
This is what we originally planned to use, but couldn't find any that matched our specific flooring at the local Floor and Decor stores. That's when we decided to use pine outside corner molding that we could stain to match our flooring. We found it with the other wood trim options at Home Depot.
We cut both ends to a 45-degree angle to create a finished look on the corners, gave it a coat of stain and then nailed them into place with our nail gun. I've heard of other people using contact cement to attach a trim piece but we opted to use the nail gun instead.
(Update: Should have listened to Katie and used the contact cement because we've since had to randomly hammer back the nails that pop out. It hasn't happened a ton, but it has happened over the years. You can read about it in our RV flops post/video.)
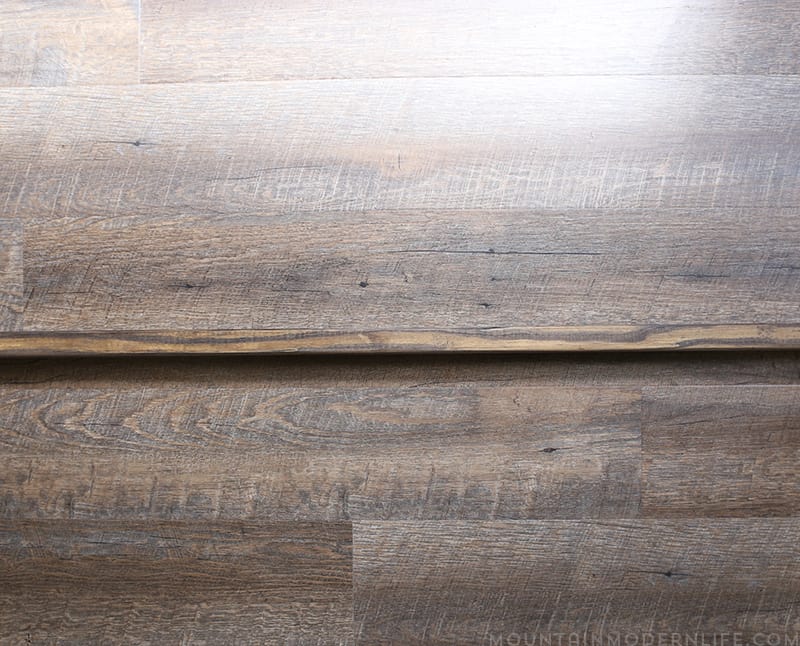
You can watch the video at the top of this post to see how the slide looks with the trim piece added, but here's a close-up photo where the slide-out meets the rest of the flooring:

The moment of truth happened now. I took my first step on the edge of the last row, and a smile took complete hold of me. Not only was the slight sway from before gone, but the entire edge was completely secure, not even the slightest wiggle.

Here are some additional tips we learned in order to replace the flooring inside an RV slide out.
Tip 1:
If removing carpet from your slide-out, know going in that your patience will be tested. Pulling out every strand of carpet can be stressful, make sure you focus and push forward and you will get the carpet out.

Tip 2:
Once we removed the carpet we noticed a piece of black plastic had been stapled down along the edge of the slide-out. This long piece of plastic was there to act as a bridge for the carpet to rest on, meaning it moved up and down with any footsteps that came in contact with it. Considering our floating floors do not bend like the carpet does we needed to remove this piece.
Tip 3:
Once this piece was removed we realized there was a decent size gap between where the flooring came off of the slide and the floor of the main section of the RV. In order to combat this, we used a piece of outside corner moulding as a trim piece.
The outside corner moulding works well though we needed to still leave a small gap between it and the main floor of the RV so that the slide could move in and out without scratching the flooring.
Once we replaced the flooring with the addition of underlayment we realized the small gap does not affect the integrity of the slide-out flooring.
Side-Note: Our slide out does not come completely level with the main flooring of the RV, however, we have seen models that do. If your slide-out does become flush with the main flooring you may want to consider a different transition piece.
Tip 4:
Once you have laid your underlayment and placed the floating floors down, you may realize that they hang over the edge of your slide out a bit too far. Don't freak out if this happens, use your best judgment and cut the pieces down a bit in order to add more strength to the lip.
We are so happy that we took the time to redo our slide out with underlayment, and would definitely suggest this route for anyone looking to replace the flooring in their slide out.
I hope this information was helpful for you and can at least give you a couple of ideas on how to replacing the flooring inside your RV slide out. As always, feel free to leave any questions or comments below.
Disclaimer: Although this is what we have learned through trial and error. When making changes to your RV be sure to consult your owner's manual, or reach out to your manufacturer to confirm the changes will be safe for your situation.
Have you replaced the flooring in your RV slide-out and have any tips to share? If so we would love to hear about them in the comments so that others can learn from your experience as well!

How to update RV flooring
How to create a custom RV "doghouse" engine cover
How to Replace Carpet in Rv With Slides
Source: https://mountainmodernlife.com/replace-the-flooring-inside-a-rv-slide-out/